The Short Answer: How to Match a Hard Cooler to Your Needs
Choosing the right hard cooler comes down to three variables: how much you need to store (capacity), how far you need to carry it (weight), and how long your food and drinks must stay cold (insulation performance). Get all three right, and a hard cooler becomes one of the most reliable pieces of outdoor gear you own. Get any one wrong, and you are either lugging an oversized box or running out of cold storage by day two.
This hard cooler capacity weight insulation guide walks you through every decision point — from calculating the right quart size for your group to understanding what wall thickness actually means for ice retention. Whether you are planning a solo overnight trip or a week-long family campout, the framework below will tell you exactly what size cooler you need and why.
Understanding Cooler Capacity: Quarts, Liters, and What They Really Mean
Cooler capacity is measured in quarts (qt) in the US and liters (L) internationally. One quart equals approximately 0.95 liters, so a 45-quart cooler holds roughly 42.5 liters. But the rated capacity on the box refers to total interior volume — including the space taken up by ice. This distinction matters more than most buyers realize.
A standard rule of thumb used by experienced campers and outdoor guides: ice will consume 30–40% of usable interior space. So a 60-quart cooler gives you roughly 36–42 quarts of actual food and drink storage after packing ice. Plan around usable capacity, not the number on the lid.
Capacity-to-Person Formula
A widely used industry benchmark is 20 quarts of cooler capacity per person per day for a fully stocked cooler with ice. This accounts for meals, snacks, and beverages at a comfortable margin. For drinks-only coolers (no food), you can drop this to about 12–15 quarts per person per day.
Example: a group of 4 people on a 3-day weekend trip needs approximately 4 × 3 × 20 = 240 quarts of total capacity. That sounds enormous — and it is for a single cooler. Most groups split this across two coolers: one dedicated to food, one for drinks. Keeping a separate drink cooler that gets opened frequently prevents the food cooler from losing cold air constantly, extending ice life significantly.
Cooler Sizes Chart: Which Size Is Right for Which Trip?
The market segments hard coolers into five broad size categories. Here is a comprehensive cooler sizes chart to help you match cooler volume to trip type and group size:
| Cooler Size | Capacity (qt) | Ideal Group Size | Best Trip Length | Typical Use Case |
|---|---|---|---|---|
| Personal / Mini | 16–25 qt | 1 person | Day trip to 1 night | Fishing, solo hikes, beach days |
| Small | 26–45 qt | 1–2 people | 1–3 nights | Couple camping, tailgating, road trips |
| Medium | 46–65 qt | 2–4 people | 2–5 nights | Family weekend camping, overlanding |
| Large | 66–105 qt | 4–6 people | 4–7 nights | Extended camping, large group trips |
| Extra Large / Commercial | 110–400 qt | 6+ people | Week+ expeditions | Hunting camps, river expeditions, events |
When in doubt between two sizes, choose the larger one. A cooler that is slightly too big is far more manageable than one that is too small — you can always fill empty space with extra ice to improve cold retention, which actually improves efficiency rather than wasting it.
What Size Cooler for Weekend Camping? A Practical Breakdown
Weekend camping — typically Friday evening through Sunday afternoon, roughly 2–3 days — is the most common use case for hard coolers. It is also where buyers most frequently get sizing wrong, either underpacking a 25-quart personal cooler or overspending on a 150-quart behemoth they cannot lift into the truck bed.
Here is what size cooler for weekend camping looks like across different group configurations:
- Solo camper, 2–3 nights: A 25–35 quart cooler is the sweet spot. It holds 2–3 days of food and drinks for one person with room for a solid ice block.
- Couple, 2–3 nights: A 45–55 quart cooler handles two people comfortably over a weekend without becoming too heavy to manage solo.
- Family of 4, 2–3 nights: Plan for 65–80 quarts total. This often means one 45-quart drink cooler plus one 45-quart food cooler — easier to carry and better for ice retention than one massive single unit.
- Group of 6, 2–3 nights: 100–120 quarts total across two coolers. One person should not be expected to carry more than 60–70 pounds, which is roughly the weight limit of a fully loaded 65-quart cooler.
The most versatile cooler size for weekend camping — capable of handling a range of group sizes and trip lengths — is the 45–65 quart range. Models in this bracket dominate sales charts precisely because they hit the intersection of useful capacity, manageable weight, and reasonable price.
How Big a Cooler Do I Need? Five Questions to Find Your Answer
If you are still asking yourself how big a cooler do I need, work through these five questions in order. Your answers will point you to a specific size range more accurately than any generic chart.
1. How many people are you feeding?
Use the benchmark of 20 quarts per person per day as your starting calculation. Adjust downward by 20–25% if you are primarily storing drinks (not full meals), or upward by 10–15% if you are cooking elaborate meals with bulky ingredients like whole vegetables, large cuts of meat, or glass-bottled beverages.
2. How long is the trip?
Trip length affects both required capacity and required insulation performance. For trips beyond 5 days, insulation quality becomes as important as size — because even a perfectly sized cooler loses all its value if the ice melts by day three.
3. Will you have access to ice resupply?
If you are camping near a town with a gas station or grocery store, you can plan around resupplying ice every 2–3 days. This lets you use a smaller, lighter cooler. Remote backcountry camping with no resupply means you need both a larger cooler (to hold more ice) and a higher-performance insulation system.
4. How will you transport it?
A fully loaded 100-quart cooler can weigh 130–160 pounds. That is a two-person lift under ideal conditions. If you are loading it into a truck bed alone, or carrying it more than 50 feet from the parking area, weight becomes a hard constraint. Never choose a cooler larger than you can realistically move when fully loaded.
5. Food and drinks together, or separate coolers?
Using two coolers — one for food, one for drinks — is the single most effective strategy for extending ice life. The drink cooler gets opened 10–20 times a day; the food cooler, only 3–5 times. Keeping them separate means the food cooler retains cold far longer. If you plan to use this approach, you can size each cooler at roughly 60% of what a single combined cooler would need to be.
Cooler Weight: The Variable Most Buyers Underestimate
Hard cooler weight has two components: empty weight (the cooler itself) and loaded weight (with ice and contents). Both matter. A premium rotomolded hard cooler with thick insulation walls is significantly heavier empty than a cheaper injection-molded model of the same capacity — sometimes by 10–15 pounds. That difference compounds dramatically when you add 20 pounds of ice and 30 pounds of food and drinks.
| Cooler Size (qt) | Avg. Empty Weight | Ice Weight (full pack) | Food + Drink Weight | Approx. Loaded Weight |
|---|---|---|---|---|
| 25 qt | 10–14 lbs | 8–10 lbs | 10–15 lbs | 28–39 lbs |
| 45 qt | 18–23 lbs | 16–20 lbs | 20–28 lbs | 54–71 lbs |
| 65 qt | 25–32 lbs | 22–28 lbs | 28–38 lbs | 75–98 lbs |
| 100 qt | 35–45 lbs | 35–45 lbs | 45–60 lbs | 115–150 lbs |
Weight-Saving Features Worth Paying For
If weight is a primary concern, look for these features when comparing models:
- Integrated wheels and a telescoping handle — found on 60+ quart models from brands like YETI, Pelican, and RovR; eliminates the need to carry a heavy cooler more than a few feet at a time
- Rope or rubber side handles — wide, ergonomic handles make a significant difference when two people carry a loaded cooler over uneven terrain
- Blow-molded vs. rotomolded construction — blow-molded coolers (standard injection-molded plastic) are lighter by 15–25% than rotomolded equivalents of the same size, though they sacrifice some durability and insulation thickness
- Dry ice compatibility — some premium coolers accept dry ice, which weighs less per unit of cooling power than water ice, effectively improving your usable capacity-to-weight ratio
Insulation Performance: What "Days of Ice Retention" Actually Means
Insulation is the most technically complex aspect of a hard cooler — and the one where marketing claims most frequently mislead buyers. When a manufacturer says a cooler keeps ice for "10 days," that figure is measured under controlled laboratory conditions: the cooler pre-chilled, packed with a specific ice-to-content ratio, and stored in shade at a fixed ambient temperature (typically 70–75°F / 21–24°C). Real-world performance is almost always lower.
Wall Thickness and Insulation Materials
The primary insulation material in hard coolers is closed-cell polyurethane foam, injected between the inner and outer shells during manufacturing. Thicker walls retain cold longer, but add weight and reduce interior volume relative to exterior dimensions.
- Budget coolers (Coleman, Igloo standard line): 1–1.5 inches of foam insulation; ice retention of 1–3 days under normal conditions
- Mid-range coolers (Lifetime, Pelican Dayventure): 2–2.5 inches of foam; ice retention of 3–5 days
- Premium rotomolded coolers (YETI Tundra, Pelican Elite, RTIC): 2–3 inches of foam; ice retention of 5–10+ days under optimal conditions
- Vacuum-insulated hard coolers (Hydro Flask Oasis, newer premium models): vacuum panels similar to insulated water bottles; potential for 10–14+ days ice retention but at significantly higher cost and weight
The Lid Gasket: The Most Overlooked Insulation Component
Up to 30% of cold loss in a hard cooler occurs through the lid seal, not through the walls. A degraded, misaligned, or poorly designed lid gasket can cut ice retention time nearly in half. When evaluating a cooler's insulation quality, check:
- Whether the lid gasket is replaceable (it should be — gaskets wear out)
- Whether the lid has a freezer-style press-fit seal rather than a simple hinge closure
- Whether latches pull the lid tight against the gasket when closed
Insulation Performance by Trip Length
| Trip Length | Min. Ice Retention Needed | Recommended Cooler Tier | Typical Wall Thickness |
|---|---|---|---|
| Day trip (under 24 hrs) | 1 day | Budget | 1–1.5 in |
| Weekend camping (2–3 days) | 3–4 days | Mid-range | 2–2.5 in |
| Extended trip (4–7 days) | 5–7 days | Premium rotomolded | 2.5–3 in |
| Expedition (7+ days) | 10+ days | Premium / vacuum-insulated | 3+ in or vacuum panel |
What Size Cooler for Camping: Special Scenarios and Adjustments
Understanding cooler size for camping is not one-size-fits-all. Several scenario-specific factors can shift your sizing decision significantly.
Hot Weather Camping
Ambient temperatures above 90°F (32°C) accelerate ice melt dramatically. In extreme heat, even a premium cooler rated for 10 days may only hold ice for 4–6 days. For desert camping or summer trips in hot climates, increase your planned ice allocation by 25–30% — which means sizing up to the next cooler tier or planning a resupply stop.
Car Camping vs. Overlanding
Car campers who drive directly to a campsite and leave the cooler at the site can prioritize capacity over portability. Overlanding (traveling in a 4WD vehicle on rough terrain) demands a different approach: the cooler must be secured against movement, often fits in a specific vehicle compartment, and should have a drain plug accessible without removing it from the vehicle. Many overlanders opt for a 45–60 quart cooler with built-in tie-down slots to satisfy all these constraints.
Canoe, Kayak, and Raft Trips
Water-based trips introduce two constraints standard camping does not: the cooler must fit inside or across the vessel, and it must withstand water exposure. Many river guides specify a maximum cooler dimension of 21 inches wide to fit between gunwales in a canoe. Rotomolded coolers double as seats on river trips — look for models rated to support 300–500 pounds of standing weight.
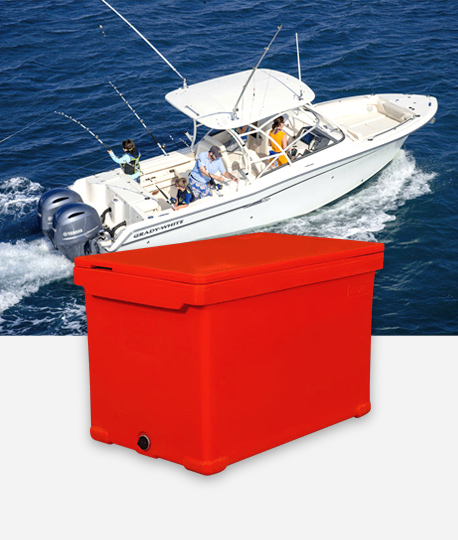
Hunting and Fishing Trips
For hunting and fishing, the cooler serves a dual purpose: keeping food cold going in and storing harvested game or catch coming out. A successful deer hunt can yield 60–80 pounds of processed meat. This application typically demands a 100+ quart cooler — not for food storage, but for bringing the harvest home safely. Many hunters keep a dedicated 150-quart game cooler separate from their food cooler for exactly this reason.
How Much Cooler Do You Actually Need? Budget vs. Performance Trade-offs
Understanding how much cooler you need is as much about budget as it is about performance. The hard cooler market spans a wide price range, and the performance gains at the premium end are real — but not always necessary for every buyer.
- Under $75 (budget tier): Coleman and Igloo standard models. Adequate for day trips and weekend camping with daily ice access. Ice retention of 1–3 days. Perfectly sufficient if you camp at sites near stores.
- $75–$200 (mid-range tier): Lifetime, Pelican Dayventure, Igloo BMX. Noticeably better insulation (3–5 days), more durable construction, and better gasket seals. The best value range for most campers.
- $200–$500 (premium tier): YETI Tundra, RTIC, Pelican Elite, Orca. Rotomolded construction, 5–10 day ice retention, bear-resistant certification on many models. Justified for frequent campers, hunters, fishers, and overlanders.
- $500+ (ultra-premium tier): YETI Tundra Haul (wheeled), Hydro Flask Oasis, custom builds. For professional outfitters and expeditions where cooler failure is not an option.
The honest answer to "how much cooler should I get" for most recreational campers: a mid-range 45–65 quart model in the $100–$200 price range covers the vast majority of camping scenarios without the weight penalty or cost of premium alternatives.
Pro Tips to Maximize Any Cooler's Performance
Regardless of which size or tier you choose, these techniques consistently extend ice life and improve usable cold storage — often more effectively than upgrading to a more expensive cooler.
- Pre-chill the cooler 24 hours before use. An unconditioned cooler at room temperature will absorb several pounds of ice simply warming the plastic shell. Fill it with sacrifice ice or ice water the night before your trip, then dump and repack with fresh ice before departure.
- Use block ice, not cubed ice. Block ice has a lower surface-area-to-volume ratio and melts significantly slower — typically lasting 2–3 times longer than equivalent weights of crushed or cubed ice. Supplement with cubed ice to fill gaps around food items.
- Pack food cold, not warm. Never put hot or room-temperature food directly into a cold cooler. Cool everything in your home refrigerator first. Every degree of warmth you bring in is ice you have to melt to compensate.
- Keep the cooler in the shade. Direct sunlight raises the exterior surface temperature dramatically. A cooler sitting in 100°F direct sun loses ice 50–75% faster than the same cooler in shade at the same ambient air temperature. Use a tarp, vehicle shadow, or tree cover whenever possible.
- Do not drain meltwater until the trip ends. Cold meltwater acts as a secondary refrigerant. Draining it removes thermal mass and allows warm air to replace it. Keep the drain plug closed until you break camp.
- Fill empty space with ice or frozen water bottles. Air gaps inside the cooler accelerate ice melt. A fully packed cooler retains cold longer than one that is half empty. Frozen water bottles serve double duty — they extend ice life and provide drinking water as they melt.
- Maintain the right ice ratio. The optimal ice-to-content ratio is approximately 2:1 by weight (two pounds of ice for every pound of food and drink). Going below a 1:1 ratio noticeably shortens ice retention time.
Final Sizing Decision Framework
Use this step-by-step framework to reach your final size decision before purchasing:
- Calculate base capacity: Number of people × Days × 20 quarts
- Subtract 25% if you plan to use a separate drink cooler
- Add 15% if temperatures will exceed 90°F / 32°C
- Check the maximum loaded weight you can realistically carry (use the weight table above)
- If the size you calculated exceeds your weight limit, split into two coolers
- Choose an insulation tier based on your longest expected trip without ice resupply
- Set your budget and find the best-reviewed model within your size and tier parameters
The right hard cooler is not the biggest one you can afford or the lightest one you can find — it is the one that matches your actual trip profile across all three dimensions of capacity, weight, and insulation. Use this guide as your reference every time you are evaluating a new purchase, and you will never end up with a cooler that lets you down at camp.

-4.png "Scatola di raffreddamento al ghiaccio di pesce isolato X-120l")
-4.png "Scatola di raffreddamento al ghiaccio di pesca isolato X-70L")

-2.png "X-120l Teranifici di trasporto di pesce vivi")
-2.png "X-70L Serma di trasporto di pesce vivi")